Table of Contents
OpenNebula Sandbox: KVM-based OpenNebula Cloud
Do you want to build a KVM-based OpenNebula cloud for testing, developing or integration under 20 minutes?
Overview
What's this for?
OpenNebula Sandbox is a series of appliances plus quick guides to help you to quickly get an OpenNebula cloud up and running. This is useful when setting up pilot clouds, to quickly test new features. It is therefore intended for testers, early adopters, developers and also integrators.
This particular Sandbox is oriented to KVM based infrastructures willing to try out OpenNebula. The sandbox is meant to be used in a Ubuntu 12.04 installation with support for virtualization. A script comes alongside the appliance to configure the nodes and start the appliance.
What's inside the appliance?
The appliance that complements this guide is a KVM compatible Virtual Machine disk, which comes with a CentOS 6.2 minimal distribution with OpenNebula 3.4.1 pre-installed.
- All the dependencies needed for the correct functioning of OpenNebula have been installed. This includes the runtime dependencies for all the OpenNebula components, as well as the building dependencies (since OpenNebula has been installed from the source code).
- The appliance relies on two network interfaces (eth0, eth1) which is configured by the companion script.
- The IP of eth0 can be selected by the user when configuring/starting the fontend. It should be in the same network as the physical nodes as this interface will be used to communicate with them.
- The second interface has a fixed IP of 10.1.1.1 and will be used to communicate with the virtual machines started by OpenNebula. All of them will be in the range 10.1.1.2-10.1.1.254.
- A NFS server comes preconfigured in the appliance to help a quick bootstrap of the storage system. A ttylinux image is already present to aid in the quickly deployment of a VM.
What comes preconfigured in OpenNebula?
OpenNebula has been configured specifically to deal with KVM servers. The following has been created to achieve a glimpse of a running OpenNebula cloud in the minimum time possible:
- A shared datastore.
- ttylinux image (
ttylinux) registered in the shared datastore. More info here. - Virtual Network (
private) configured for dynamic networking. More info on virtual networking. - VM Template using the ttylinux image and a lease from the Virtual Network,
ttylinux. More info on templates. - A regular user “oneuser” with access to the above pre-created resources.
Requirements
Frontend
You only need one of these. This is where the appliance will run.
- 64 bit cpu
- Hardware virtualization support
- Ubuntu Server 12.04 installed
- 1 Gb of RAM
- Internet connection
- Be in the same network as the nodes
- 3 Gb HDD free space
Node
You can have as many as you want but one is enough (and the minimum). The VMs started by OpenNebula will run in these machines.
- 64 bit cpu
- Hardware virtualization support
- Ubuntu Server 12.04
- 1Gb of RAM
- Be in the same network as the frontend
- 1 Gb HDD free space
Installation
The appliance is readily available at the marketplace but don't download it manually. The script used in the installation will download it or you and will set up your machines.
First you need to configure the frontend. This will download and start the appliance with OpenNebula. After that you can continue with the first node.
Frontend
Log in the frontend machine as root, download the installer script and give it executable rights.
<xterm> # curl -O http://appliances.c12g.com/one-sandbox-kvm-3.4.1/installer.sh # chmod +x installer.sh </xterm>
Pick an IP that is in the same network as the frontent and the nodes. This will be assigned to the appliance. Then execute the script with the parameters frontend and the ip selected:
<xterm> # ./installer.sh frontend <appliance ip> </xterm>
This will install the needed packages and will configure the machine so VMs can run. If asked say yes to package installation.
During the installation the appliance itself will be downloaded and started.
When the script finishes the machines should be running the appliance. It may take a bit to start but you should be able to ssh as root to the IP provided. The password is 'opennebula'.
If you have troubles connecting to it you should be able to use VNC at port 5900 of the frontend.
After the installation is completed some files will be created for you:
install.<epoch time>.log: log file with all the output/root/bridge.conf: bridge network configuration example/root/frontend.xml: libvirt description of the appliance/var/lib/one/one-frontend.img: appliance image
Node
The procedure is very similar to the frontend, you need the very same script in the node. It can be downloaded using curl or copied to the node if it does not have internet connection.
Execute it with node parameter and the appliance ip:
<xterm> # ./installer.sh node <appliance ip> </xterm>
After the installation is complete the node can be added to the OpenNebula instance running in the appliance.
What are the Users and the Passwords?
All the passwords of the accounts involved are “opennebula”. This includes:
- the linux accounts of the CentOS in the appliance, both
rootandoneadmin - the OpenNebula users, both
oneadminandoneuser
Using the appliance through Sunstone (or how do I use this)
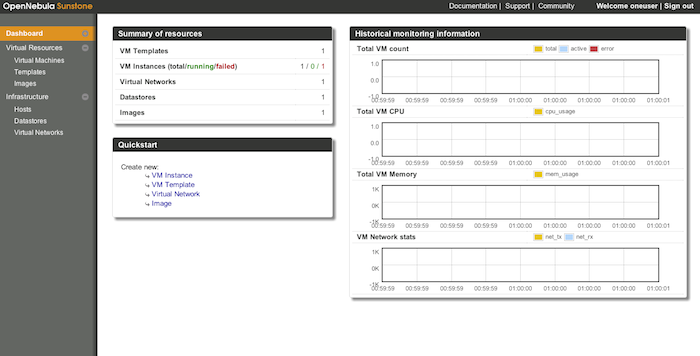
Ok, so now that everything is in place, let's start using your brand new OpenNebula cloud! Use your browser to access Sunstone. The URL would be http://@IP-of-the-appliance@:9869
Once you introduce the credentials for the “oneuser” user (remember, “opennebula” is the password) you will get to see the Sunstone dashboard. You can also log in as “oneadmin”, you will notice the access to more functionality (basically, the administration and physical infrastructure management tasks)
You will be able to see the pre-created resources. Check out the image in the “Virtual Resources/Images” tab, the template in “Virtual Resources/Templates” one and the virtual network in “Infrastructure/Virtual Networks”.
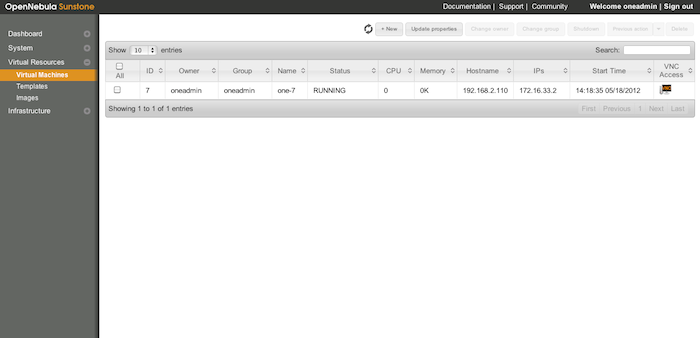
It is time to launch our first VM. This is a TinyCore based VM, that can be launched through the template. Please select it and click on the upper “Instantiate” button. If everything goes well, you should see the following the “Virtual Resources/Virtual Machines”:
Once the VM is in state RUNNING you can click on the VNC icon and you should see ttylinux prompt.
The TinyCore VM is already contextualized. If you click on the row representing the VM in sunstone, you can get the IP address assigned. Now, from a ssh session in the CentOS appliance (or any machine connected to the network 10.1.1.0) you can get ssh access to the ttylinux VM:
<xterm>
$ ssh root@<ttylinux-VM-IP>
</xterm>
The password is 'password'.


